The Ultimate Guide to Kitchen Organization: 8 Steps to a Clutter-Free Space
No more guesswork. Here is how to organize your kitchen (and keep it that way) like a pro.
Every great meal starts with good prep, which is impossible in a chaotic kitchen. If you're tired of searching for utensils and battling countertop clutter, there is an easy solution to fix this. You need to build a functional organization system, and it's easier than you think.
In this guide, we'll show you a secret weapon to help you organize like a pro. You'll learn the exact steps that turn messy kitchens into smooth-running command centers. By the end, you'll have a clear plan that works for your space and your cooking style.
Declutter before you organize
Here's what most people get wrong: they try to organize their mess. That's like putting makeup on a pig. You need to declutter first.
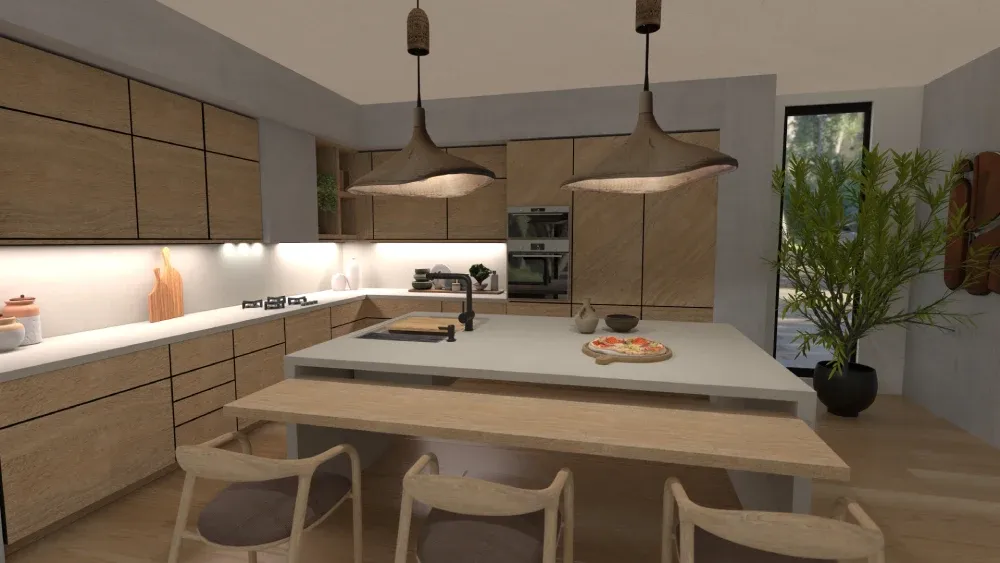
Want to design your dream kitchen faster?
Let AI do the heavy lifting with Planner 5D.
Start with the 4-box method. Grab four boxes and label them: keep, donate, trash, and relocate. Work through one area at a time. Pull everything out of your pantry. Every can, every box, every forgotten bag of flour.
Ask yourself three questions for each item:
- Have I used this in the past year?
- Is it still good or has it expired?
- Do I have multiples of this item?
Be ruthless. That bread maker you used once? Gone. The 47 coffee mugs from various hotels? Keep your favorites and donate the rest. Those expired spices from 2019? Trash.
The relocate box is for items that should be moved to other rooms. Perhaps you've stored batteries in the kitchen junk drawer, but they actually belong in your utility closet.
Work through every cabinet, drawer, and surface. This step feels hard, but it's the foundation of everything else. You can't organize clutter—you can only move it around.
Principle 1: Think in prep zones, not just cabinets
Professional organizers don't just stuff things in random cabinets. They designate storage and organize the layout based on how you actually cook. Each zone contains everything you need for specific tasks. Let's look at each one.
The prep zone
This is your countertop workspace where you chop, mix, and assemble. Keep cutting boards, knives, mixing bowls, and measuring cups within easy reach. Store prep tools in the nearest drawer or cabinet.

Your prep zone needs good lighting and enough clear counter space to do your work. If your prep zone is cramped, everything else becomes harder to access.
The cooking zone
While this is pretty self-explanatory, the cooking zone is more than just your stove and oven. To make this as efficient as possible, store pots, pans, cooking utensils, and seasonings within arm's reach.
Keep pot holders and trivets nearby, too. The key is to minimize the number of steps you take while you're cooking. You shouldn't have to walk across the kitchen to grab salt or a wooden spoon.
The cleaning zone
Build this area around your sink and dishwasher. Store dish soap, sponges, dish towels, and cleaning supplies here. Keep everyday dishes and glasses close by since this is where you'll wash and put them away.
This area is dedicated to the aftermath of cooking, so it should be easy to clean up quickly.
The consumables zone
This is the place for your pantry and refrigerator. Store backup supplies, bulk items, and non-perishables here. Group similar items together to keep track of your inventory.
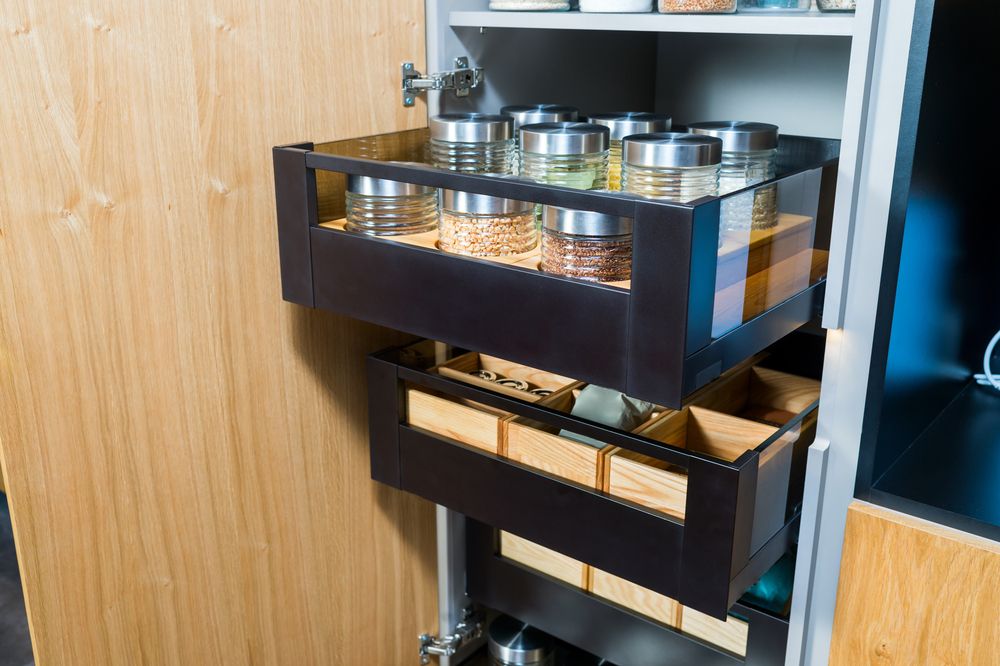
Put all baking supplies in one area, all canned goods in another. Label the shelves if needed. Your future self will thank you when you're making a grocery list.
The non-consumables zone
This area is for storing dishes, glasses, and serving pieces. Keep everyday items at eye level and within easy reach. Save high shelves for items you rarely use, like special occasion serving platters.
Keep items you use together stored together. Coffee mugs should live near your coffee maker, not across the kitchen.
Principle 2: Optimize your kitchen's workflow
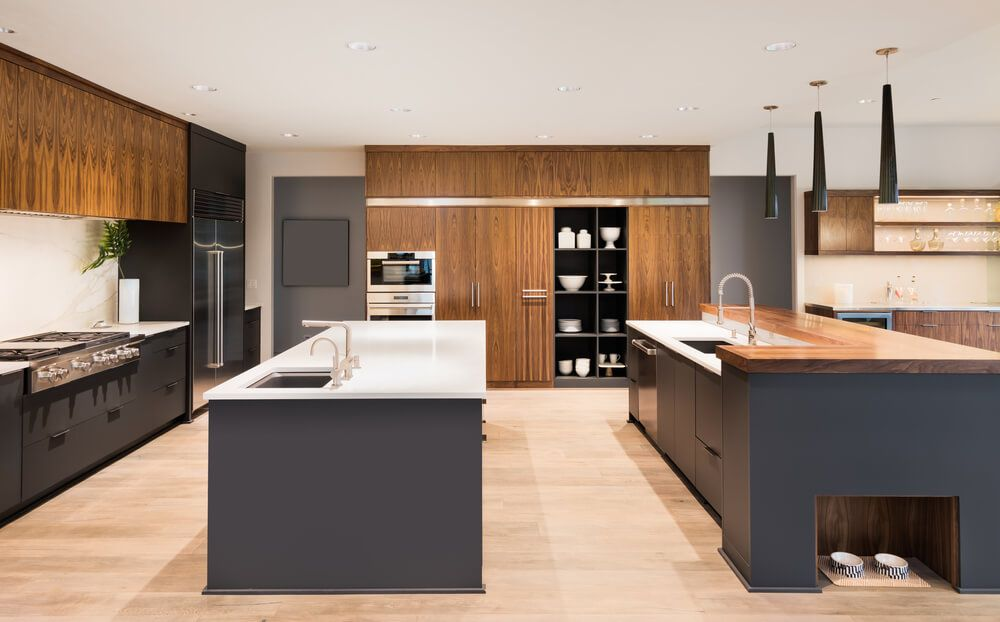
Good organization isn't just about having a place for everything. It's about creating a smooth workflow and a functional space that makes cooking feel effortless.
Understand the kitchen work triangle
The kitchen work triangle is a kitchen concept design that optimizes workflow and efficiency. In this configuration, your most-used appliances like the sink, stove, and refrigerator are organized in a triangle. It's a concept used by professional kitchen designers to create efficient layouts.
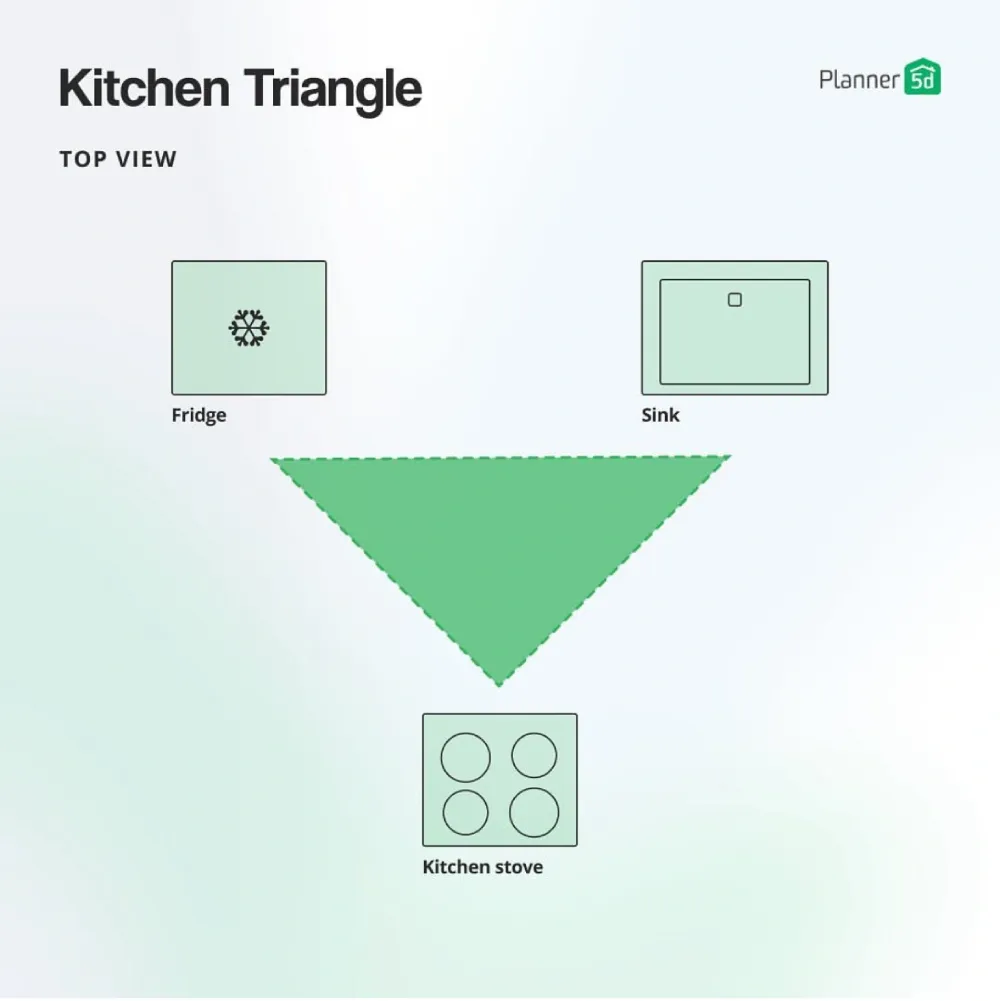
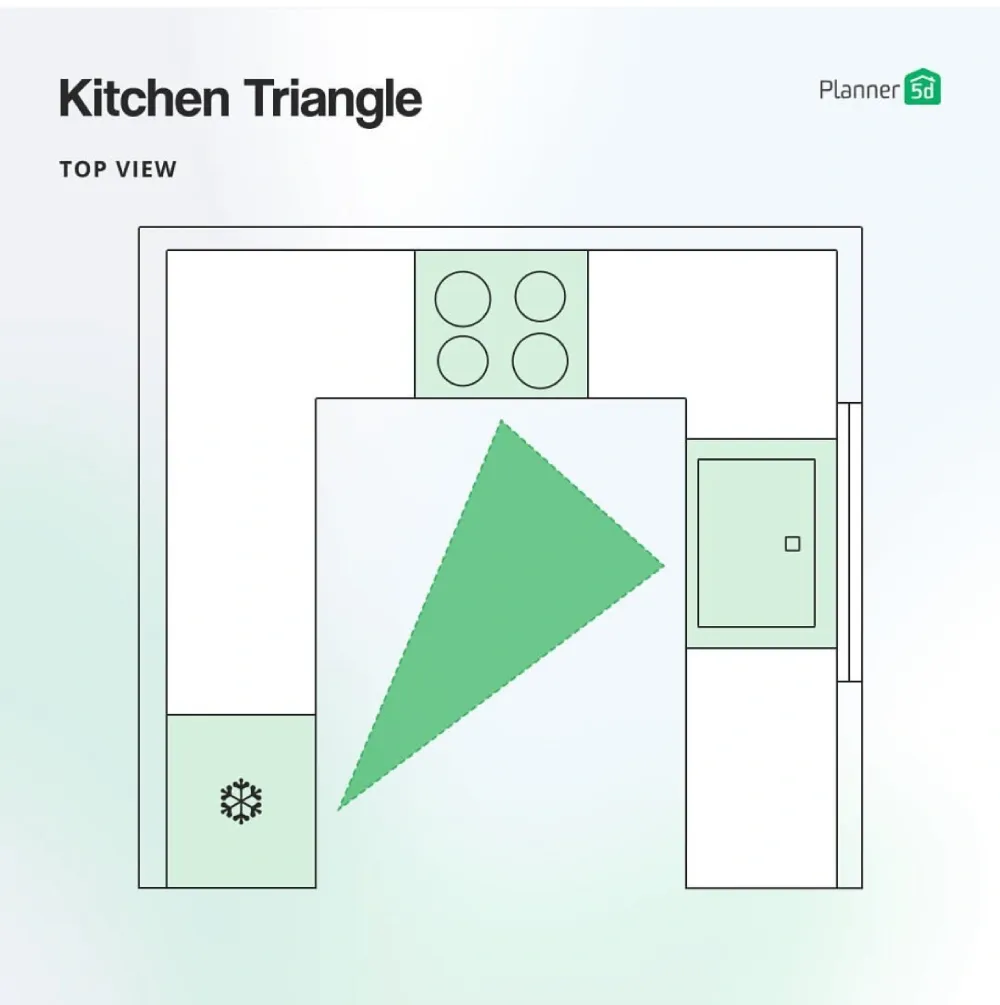
In a well-designed triangle, these three points form a triangle with sides between 4 and 9 feet long. The total distance shouldn't exceed 26 feet. This keeps you from taking unnecessary steps while cooking.
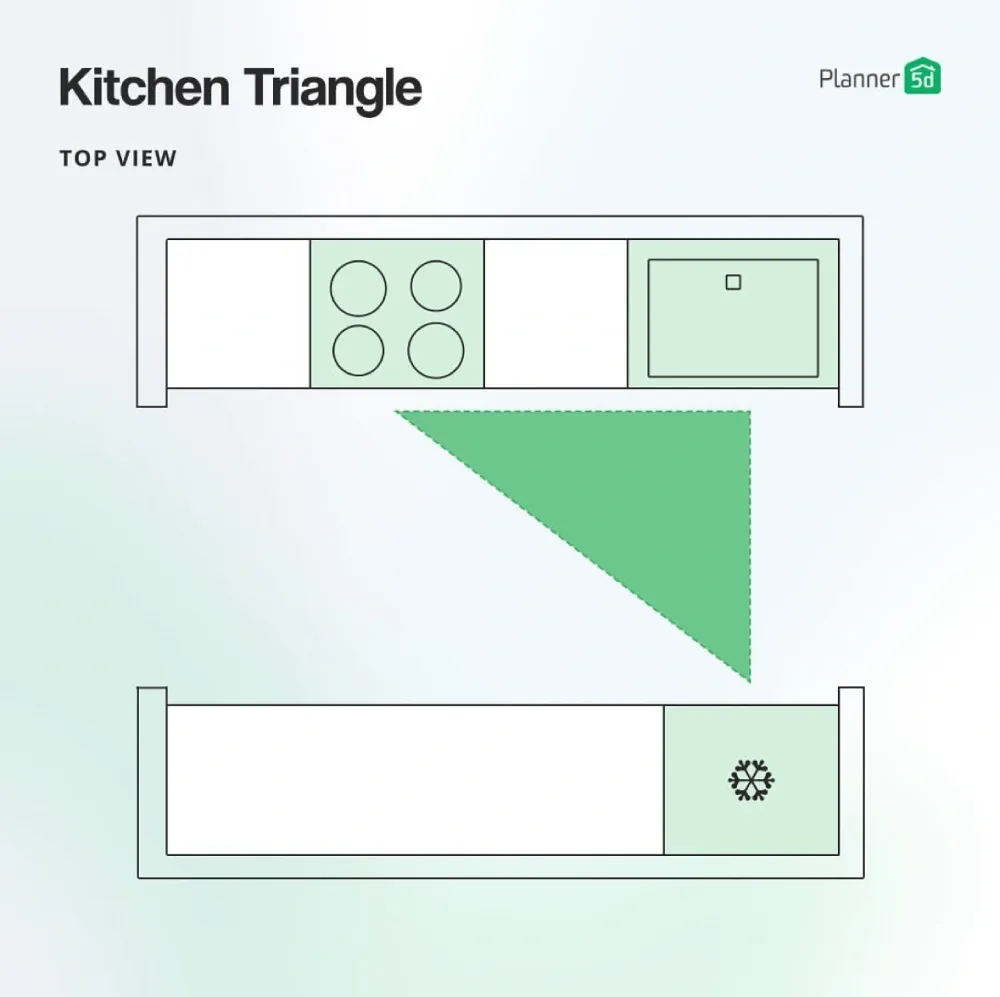
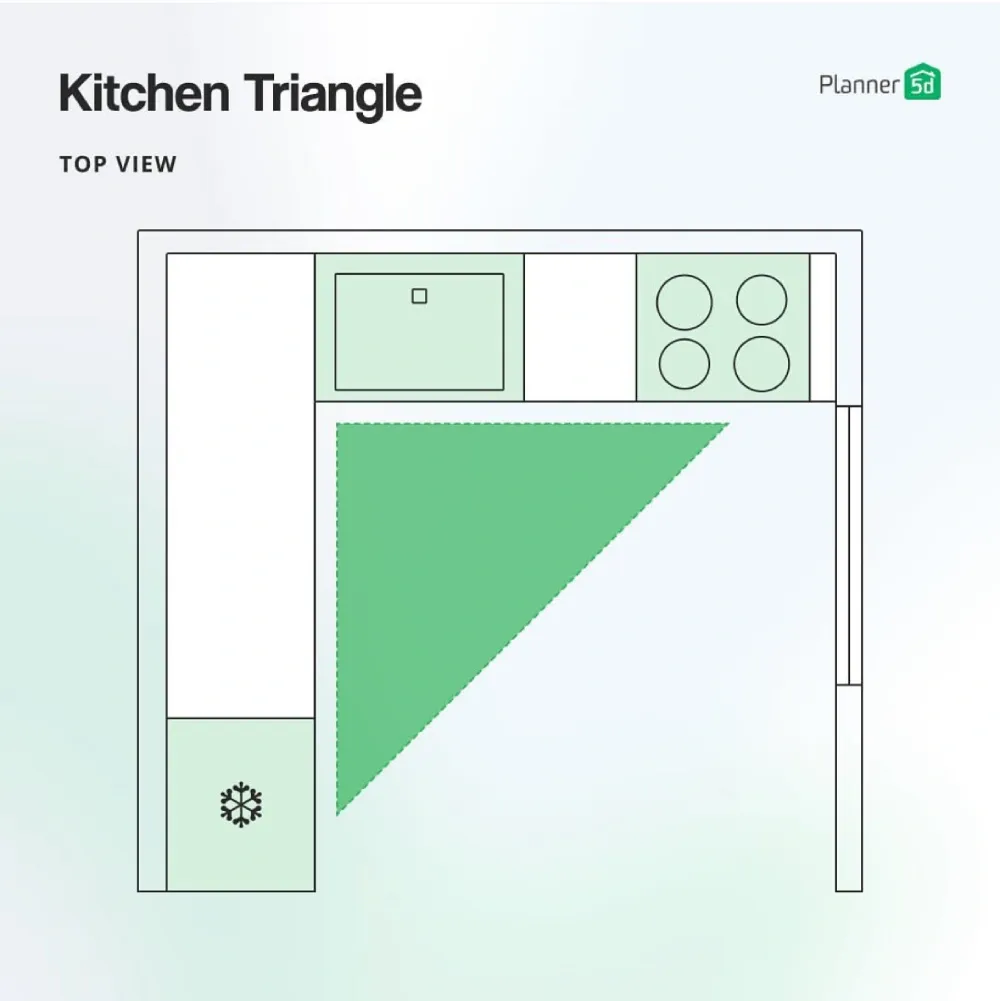
Look at your current kitchen triangle. Do you have to walk around an island to get from the fridge to the sink? Are your three points in a straight line instead of a triangle? These are signs your workflow could improve.
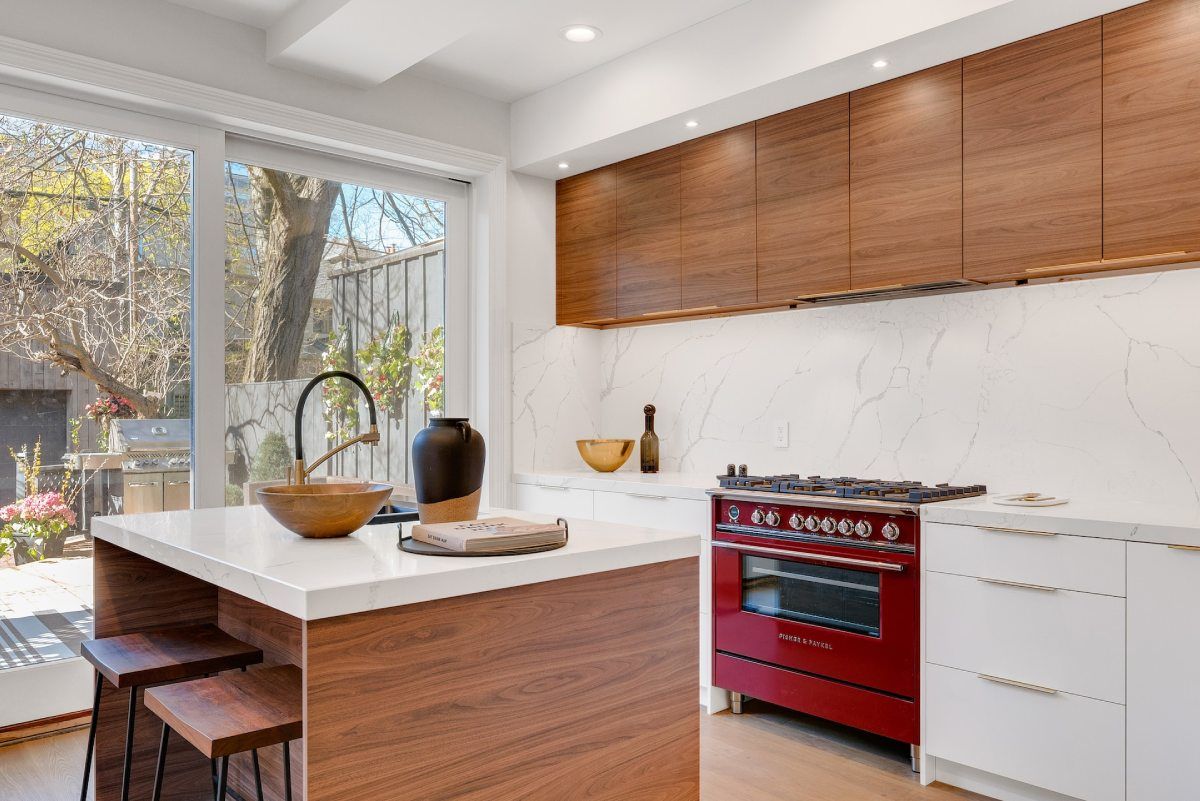
Store items at the point of use
This rule changes everything. You should store items where you use them, not where they fit. This might seem simple, yet it can be a major game-changer in the kitchen.
Think about it, spices and cooking oils belong near the stove, not in a pantry across the room. Plates and cutlery should live near the dishwasher or dining area, where you'll put them away and take them out.
Coffee supplies work best near your coffee maker. Baking ingredients should cluster together, ideally near your stand mixer if you have one.
This might mean breaking some traditional storage rules. For example, the dishes won't fit in the cabinet above the dishwasher because it's too far from your dining table. That's fine. Function beats convention every time.
Putting it all on paper (or screen)
Now that you understand the principles of kitchen organization, you need to have a plan before moving heavy appliances or buying new storage containers.
Why visualizing your plan is key
Most people skip this step and wing it. They end up moving the same items multiple times, buying storage solutions that don't fit, and getting frustrated with the whole process.
Professional organizers always plan first. They map out zones, test workflow patterns, and solve problems on paper before touching anything physically. This way, they can retool and adjust as needed till it's exactly how they envisioned it.
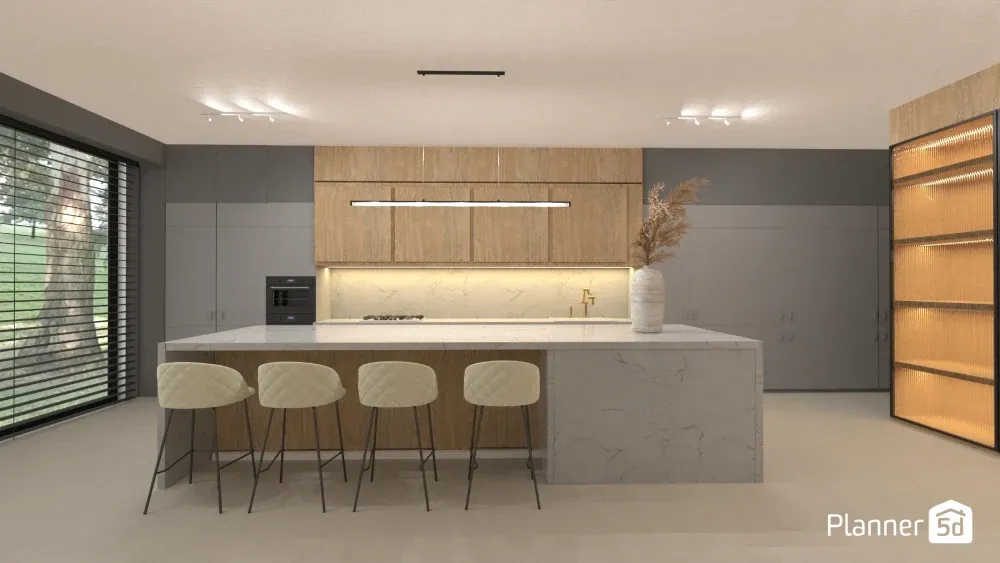
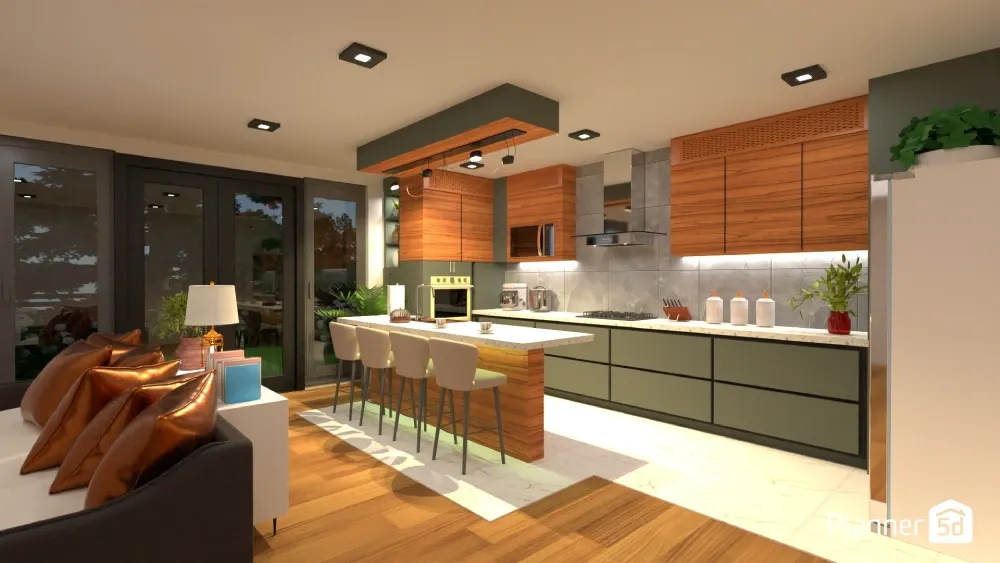
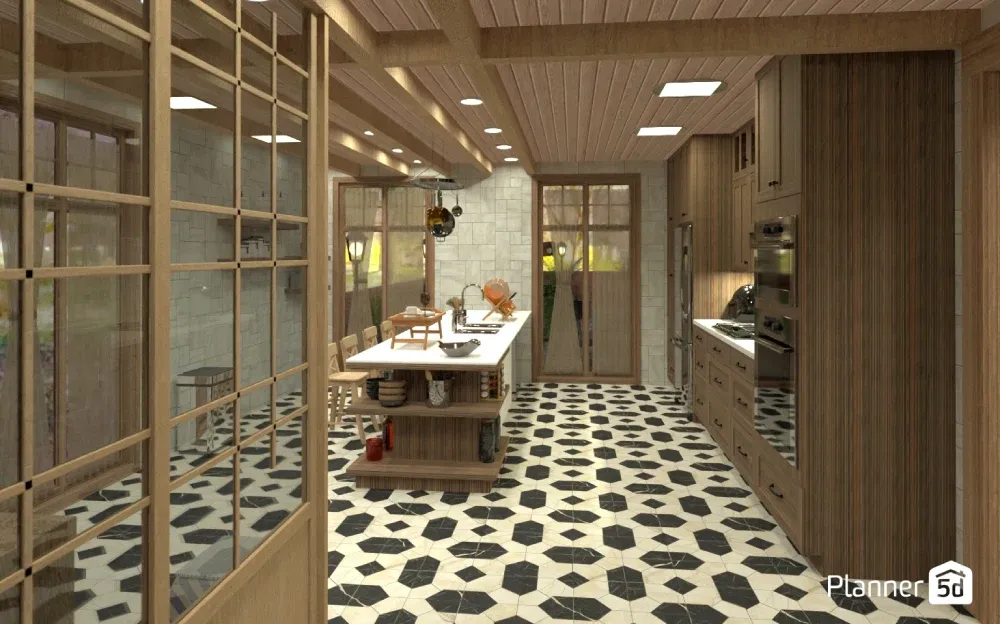
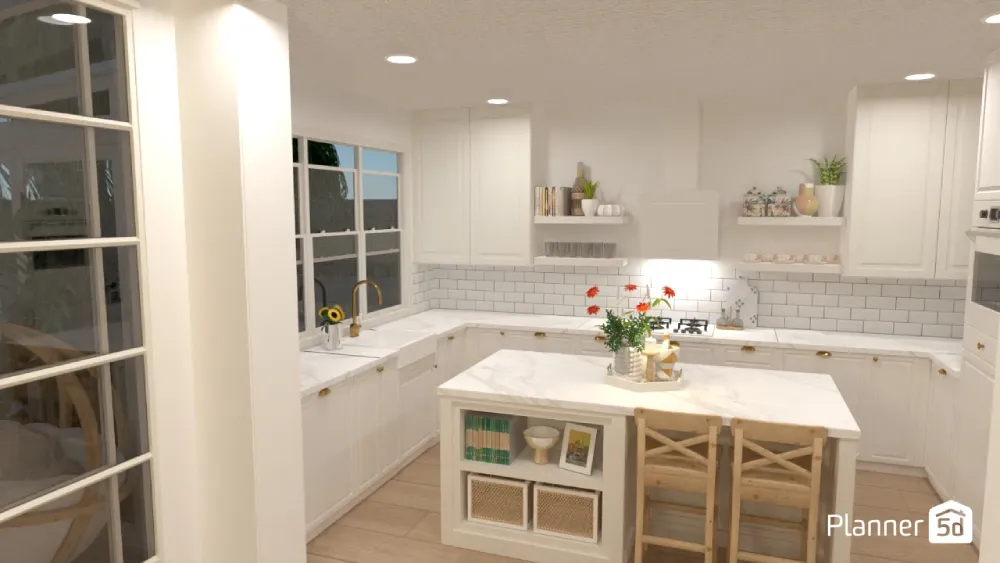
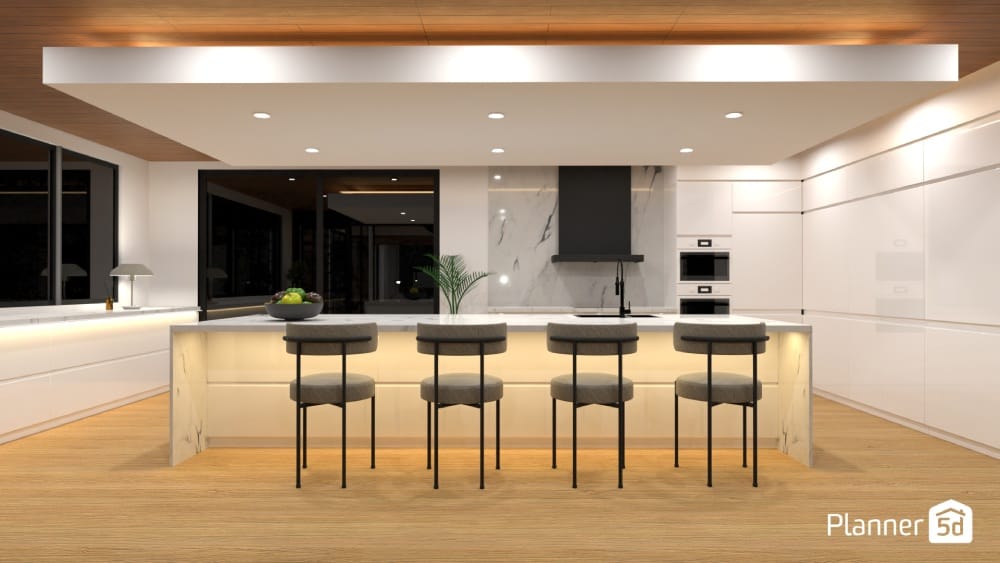
While you can sketch your plan on paper, there is a better way to go about it. Designing a 3D model of your kitchen lets you truly experience the space. Tools like Planner 5D let you build a virtual replica of your kitchen to test these ideas risk-free.
You can see exactly how your new organization system will look and function. Do a virtual walkthrough and spot problems before they happen. You can try different arrangements and finishes without lifting a finger.
How to test your kitchen organization plan in 3D
Here's how to turn those organizing principles into a concrete plan you can actually implement.
Step 1: Create a digital replica of your kitchen
Start by carefully measuring your kitchen. Note the location of windows, doors, electrical outlets, and plumbing fixtures. Measure cabinet dimensions and appliance sizes.
Input these measurements into Planner 5D to create an accurate 3D model of your current kitchen. Take your time here as accuracy matters. A wrong measurement now means your plan won't work in real life.
The software makes this easier than you might think. Use the Room Scanner feature to capture your space and then adjust the dimensions as needed. Furnish your new kitchen with items from our extensive catalog.
Step 2: Visually map your zones
Now apply the space planning principles you learned earlier. In your 3D model, group related items in their appropriate zones.
Place your knife block and cutting boards in the prep zone. Move your spice rack next to the stove in the cooking zone. Position dish storage near the sink in the cleaning area.
The visual replica of your kitchen will help you see how things relate that you might miss otherwise. Perhaps your prep zone needs more counter space, or your cooking zone feels cramped with all the items you want to store there. This is the time to try it all out.
Step 3: Test your workflow
This is where 3D modeling really shines. Use the virtual walkthrough feature to imagine how you would "cook" a typical meal in your redesigned kitchen.
Start by grabbing ingredients from the fridge. Walk to your prep zone to chop, peel and prep. Move over to the cooking zone to start preparing dinner. End at the cleaning zone with the dirty dishes.
Does the flow feel natural? Are you backtracking or avoiding things in your way? Can you easily reach everything you need in each area?
Maybe you need to move your knife storage closer to the prep area, or relocate frequently-used pots to a different cabinet. Adjust your layout until the workflow feels smooth and natural.
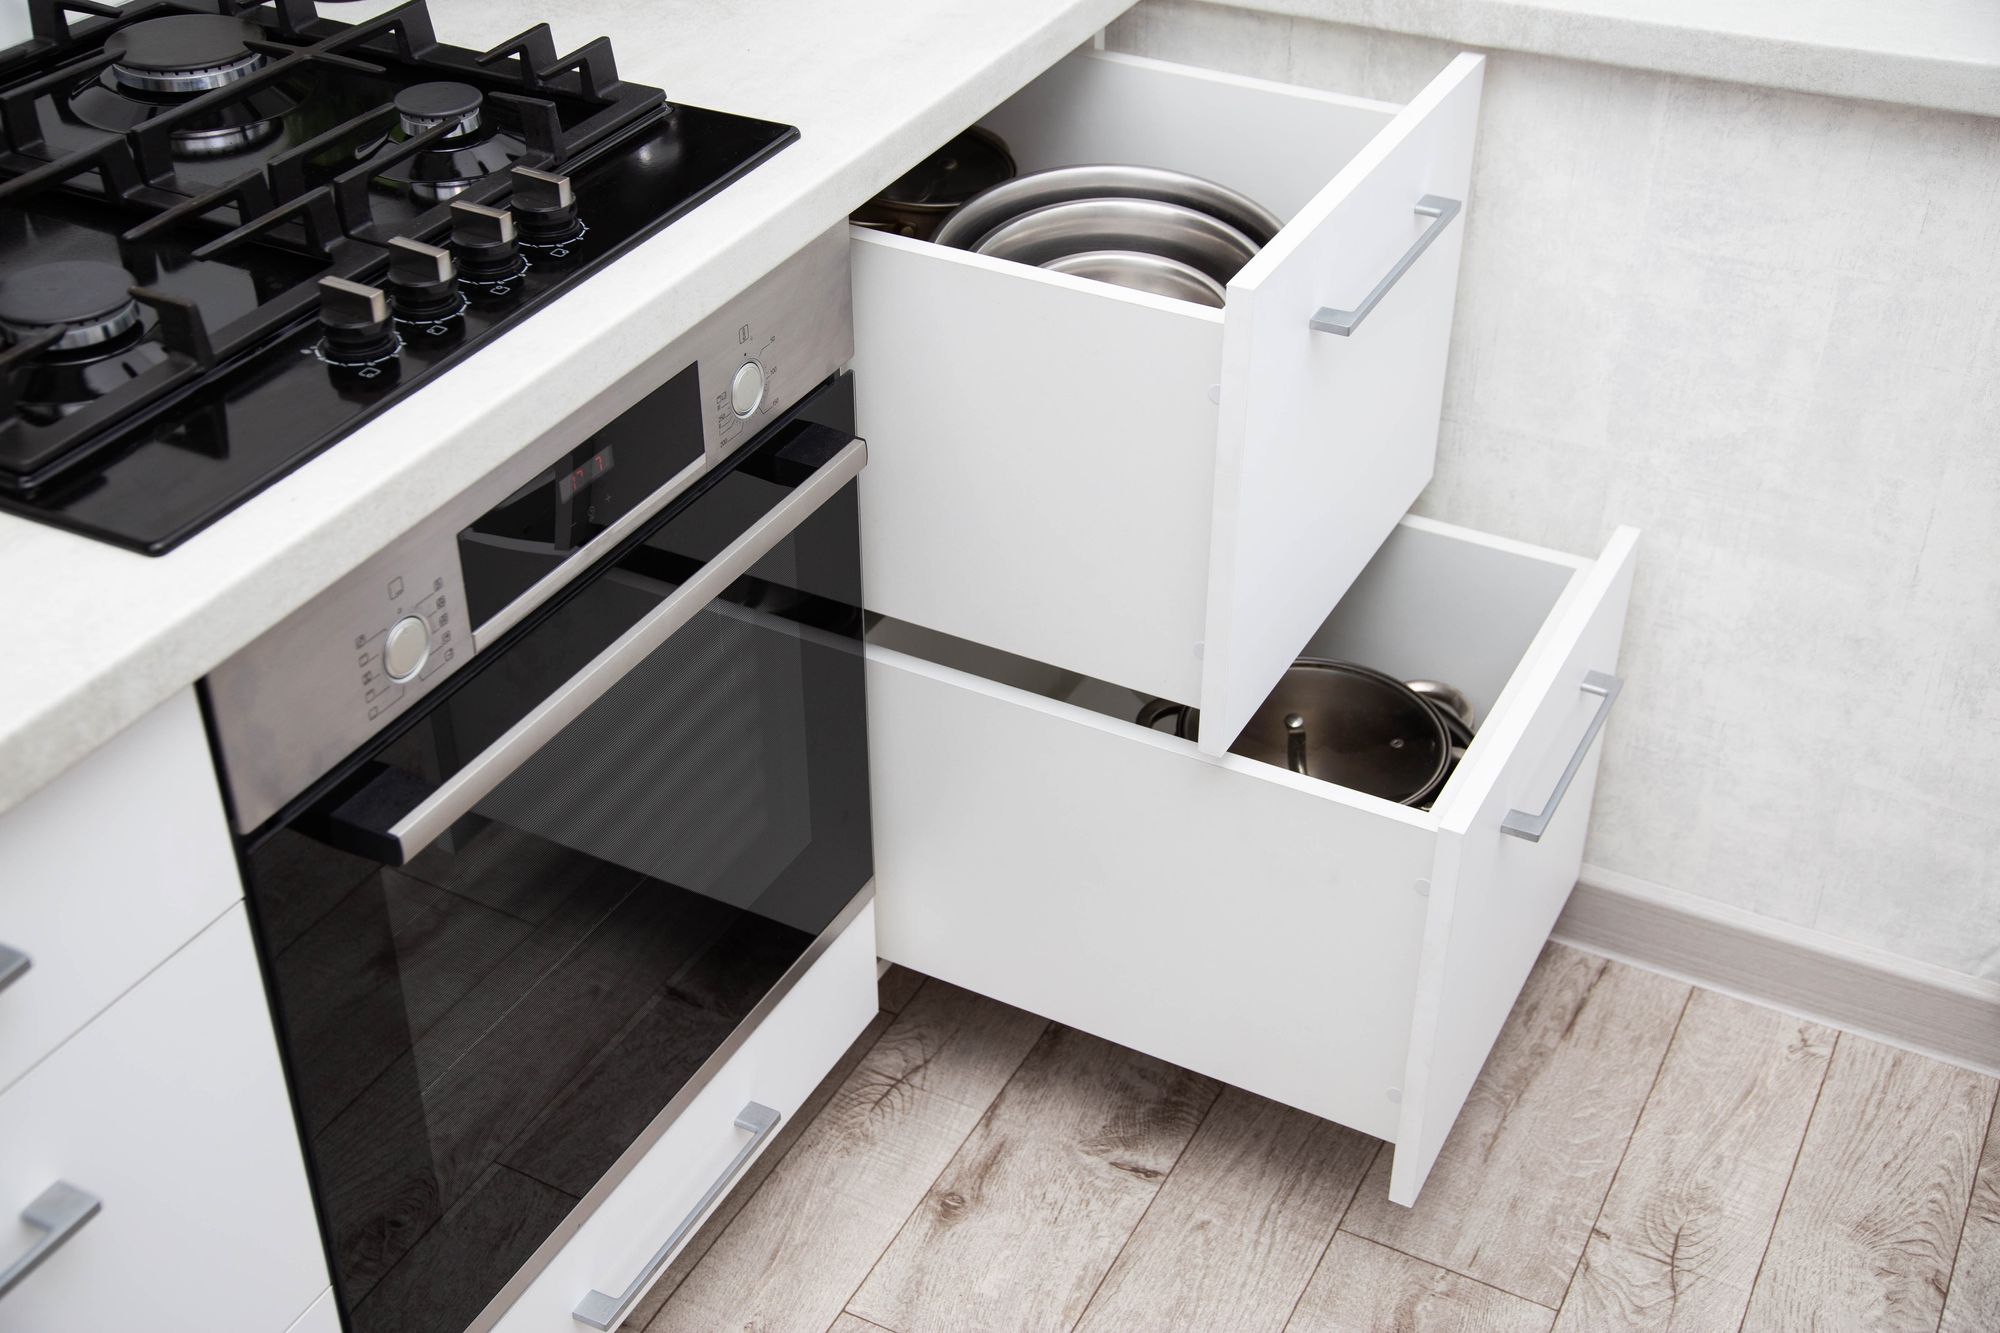
Step 4: Perfect your storage solutions
Now let's tackle specific storage challenges. This is especially crucial in small kitchens where every inch counts.
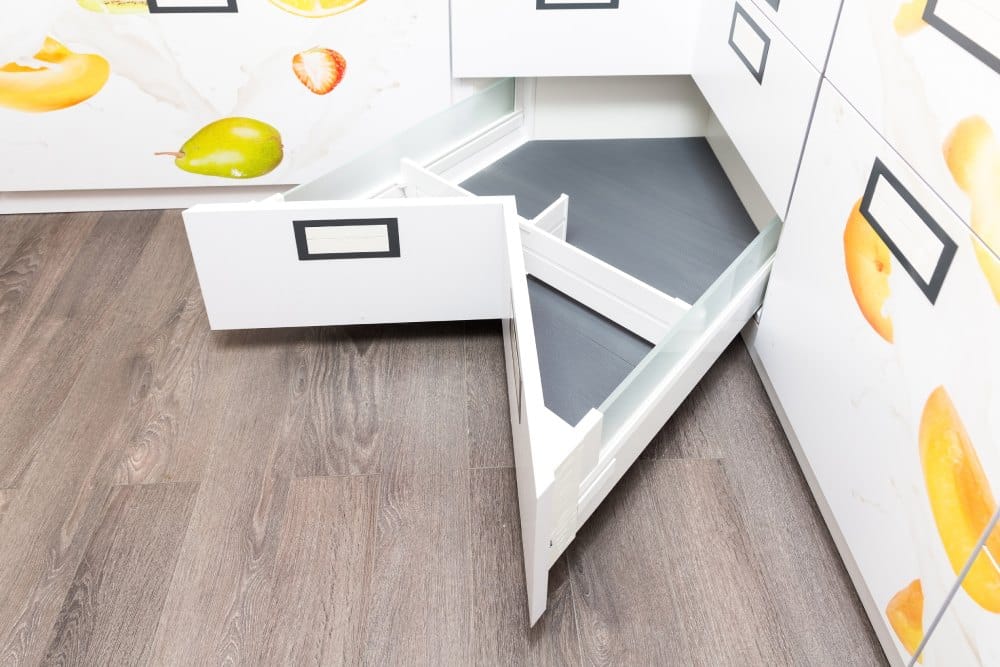
Use Planner 5D's cabinet configurations to test different storage options. Can you fit pull-out drawers in that base cabinet? Will a lazy Susan work in your corner cabinet? How many shelves can you add to that pantry? Test different heights for shelves to maximize vertical space.
For small kitchen organization, this step is crucial. You might discover that removing one shelf creates better space for tall items, or that adding dividers helps you store more in the same area.
Advanced organization strategies
- The landing strip method: Create a designated spot near your kitchen entrance for items that don't belong in the kitchen but always end up there, such as keys, mail, and phones. This prevents clutter from spreading.
- The one-touch rule: When you use something, put it back immediately rather than setting it down "temporarily." This prevents clutter from building up during cooking.
- Seasonal rotation: Store seasonal items like holiday baking supplies in harder-to-reach spots. Keep everyday items at eye level and within easy reach. Switch the order as needed.
- Vertical thinking: Utilize cabinet doors, walls, and the inside of pantry doors for extra storage. Use magnetic strips for knives, hooks for measuring cups, and narrow shelves for spices to maximize your space.
Maintaining an organized kitchen
Organization isn't a one-time project. It's a system that needs to be maintained and reviewed every so often. Here are a few habits you can incorporate into your routine.
- Do a 10-minute kitchen reset every evening.
- Put away items that migrated from their homes, wipe down counters, and load the dishwasher.
- Schedule monthly decluttering sessions and stick with them.
- Check expiration dates on items in your pantry and fridge.
- Donate items you haven't used.
- Review your designated areas quarterly. Are they still working for how you cook?
- Adjust as your needs change.
From a smart plan to a serene kitchen
The secret to an organized kitchen that stays that way isn't about buying the right products or having enough storage space. It's understanding the principles that professional organizers use: declutter first, think in zones, and optimize your workflow.
But principles alone aren't enough. You need a plan that accounts for your specific space, your cooking style, and your storage needs. Visualizing that plan in 3D helps you spot problems before they happen and ensures your new system actually works.
Your kitchen should make cooking feel effortless, not stressful. With the proper organization system, you'll spend less time searching for things and more time enjoying the process of creating great meals.
Ready to turn your kitchen organization dreams into reality? Try Planner 5D for free and create a 3D model of your perfectly organized kitchen. See exactly how your new system will look and function before you move a single item.
Take control of your space. Start with these principles, make your plan, and transform your kitchen from chaos to calm.
Planner 5D: The Future of Interior Design
Experience the power of AI-driven design with Planner 5D. Our innovative tools, including the Design Generator, Smart Wizard, and AI floor plan recognition, make bringing your dream home to life easier than ever. Transform your vision into reality and unlock a world of design possibilities today.
Start designing your dream home